headshot session pricing
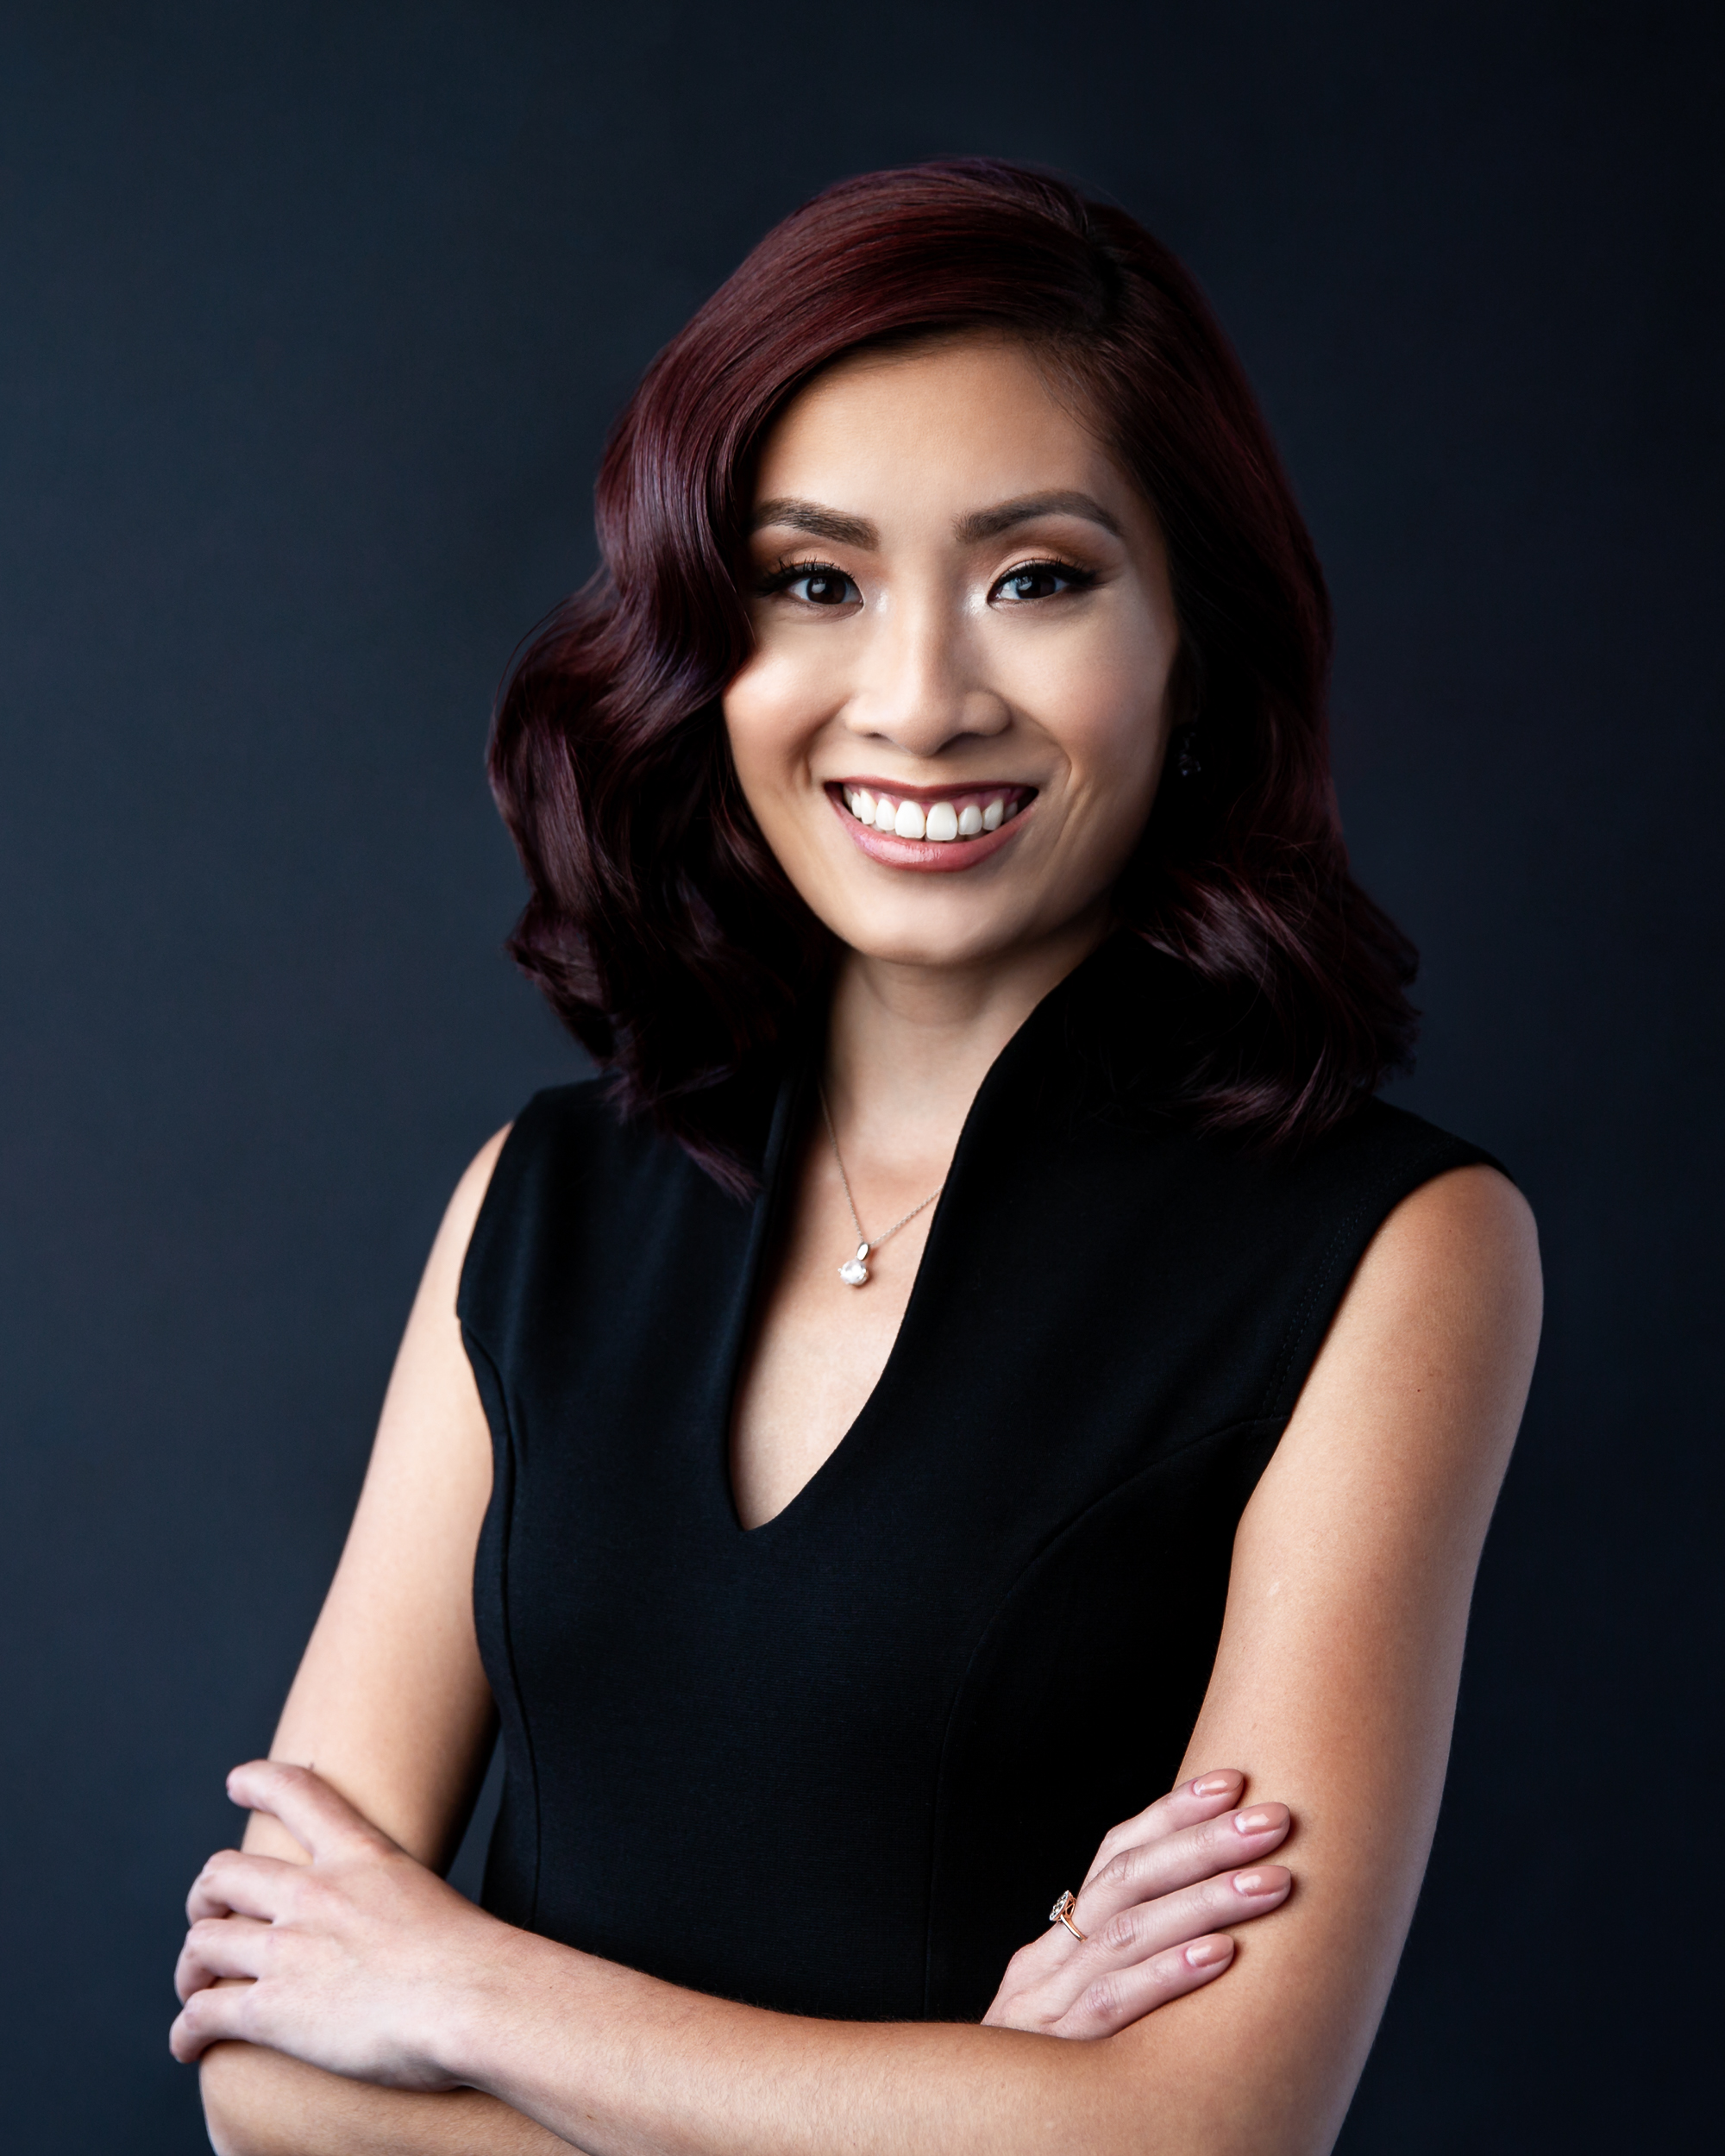
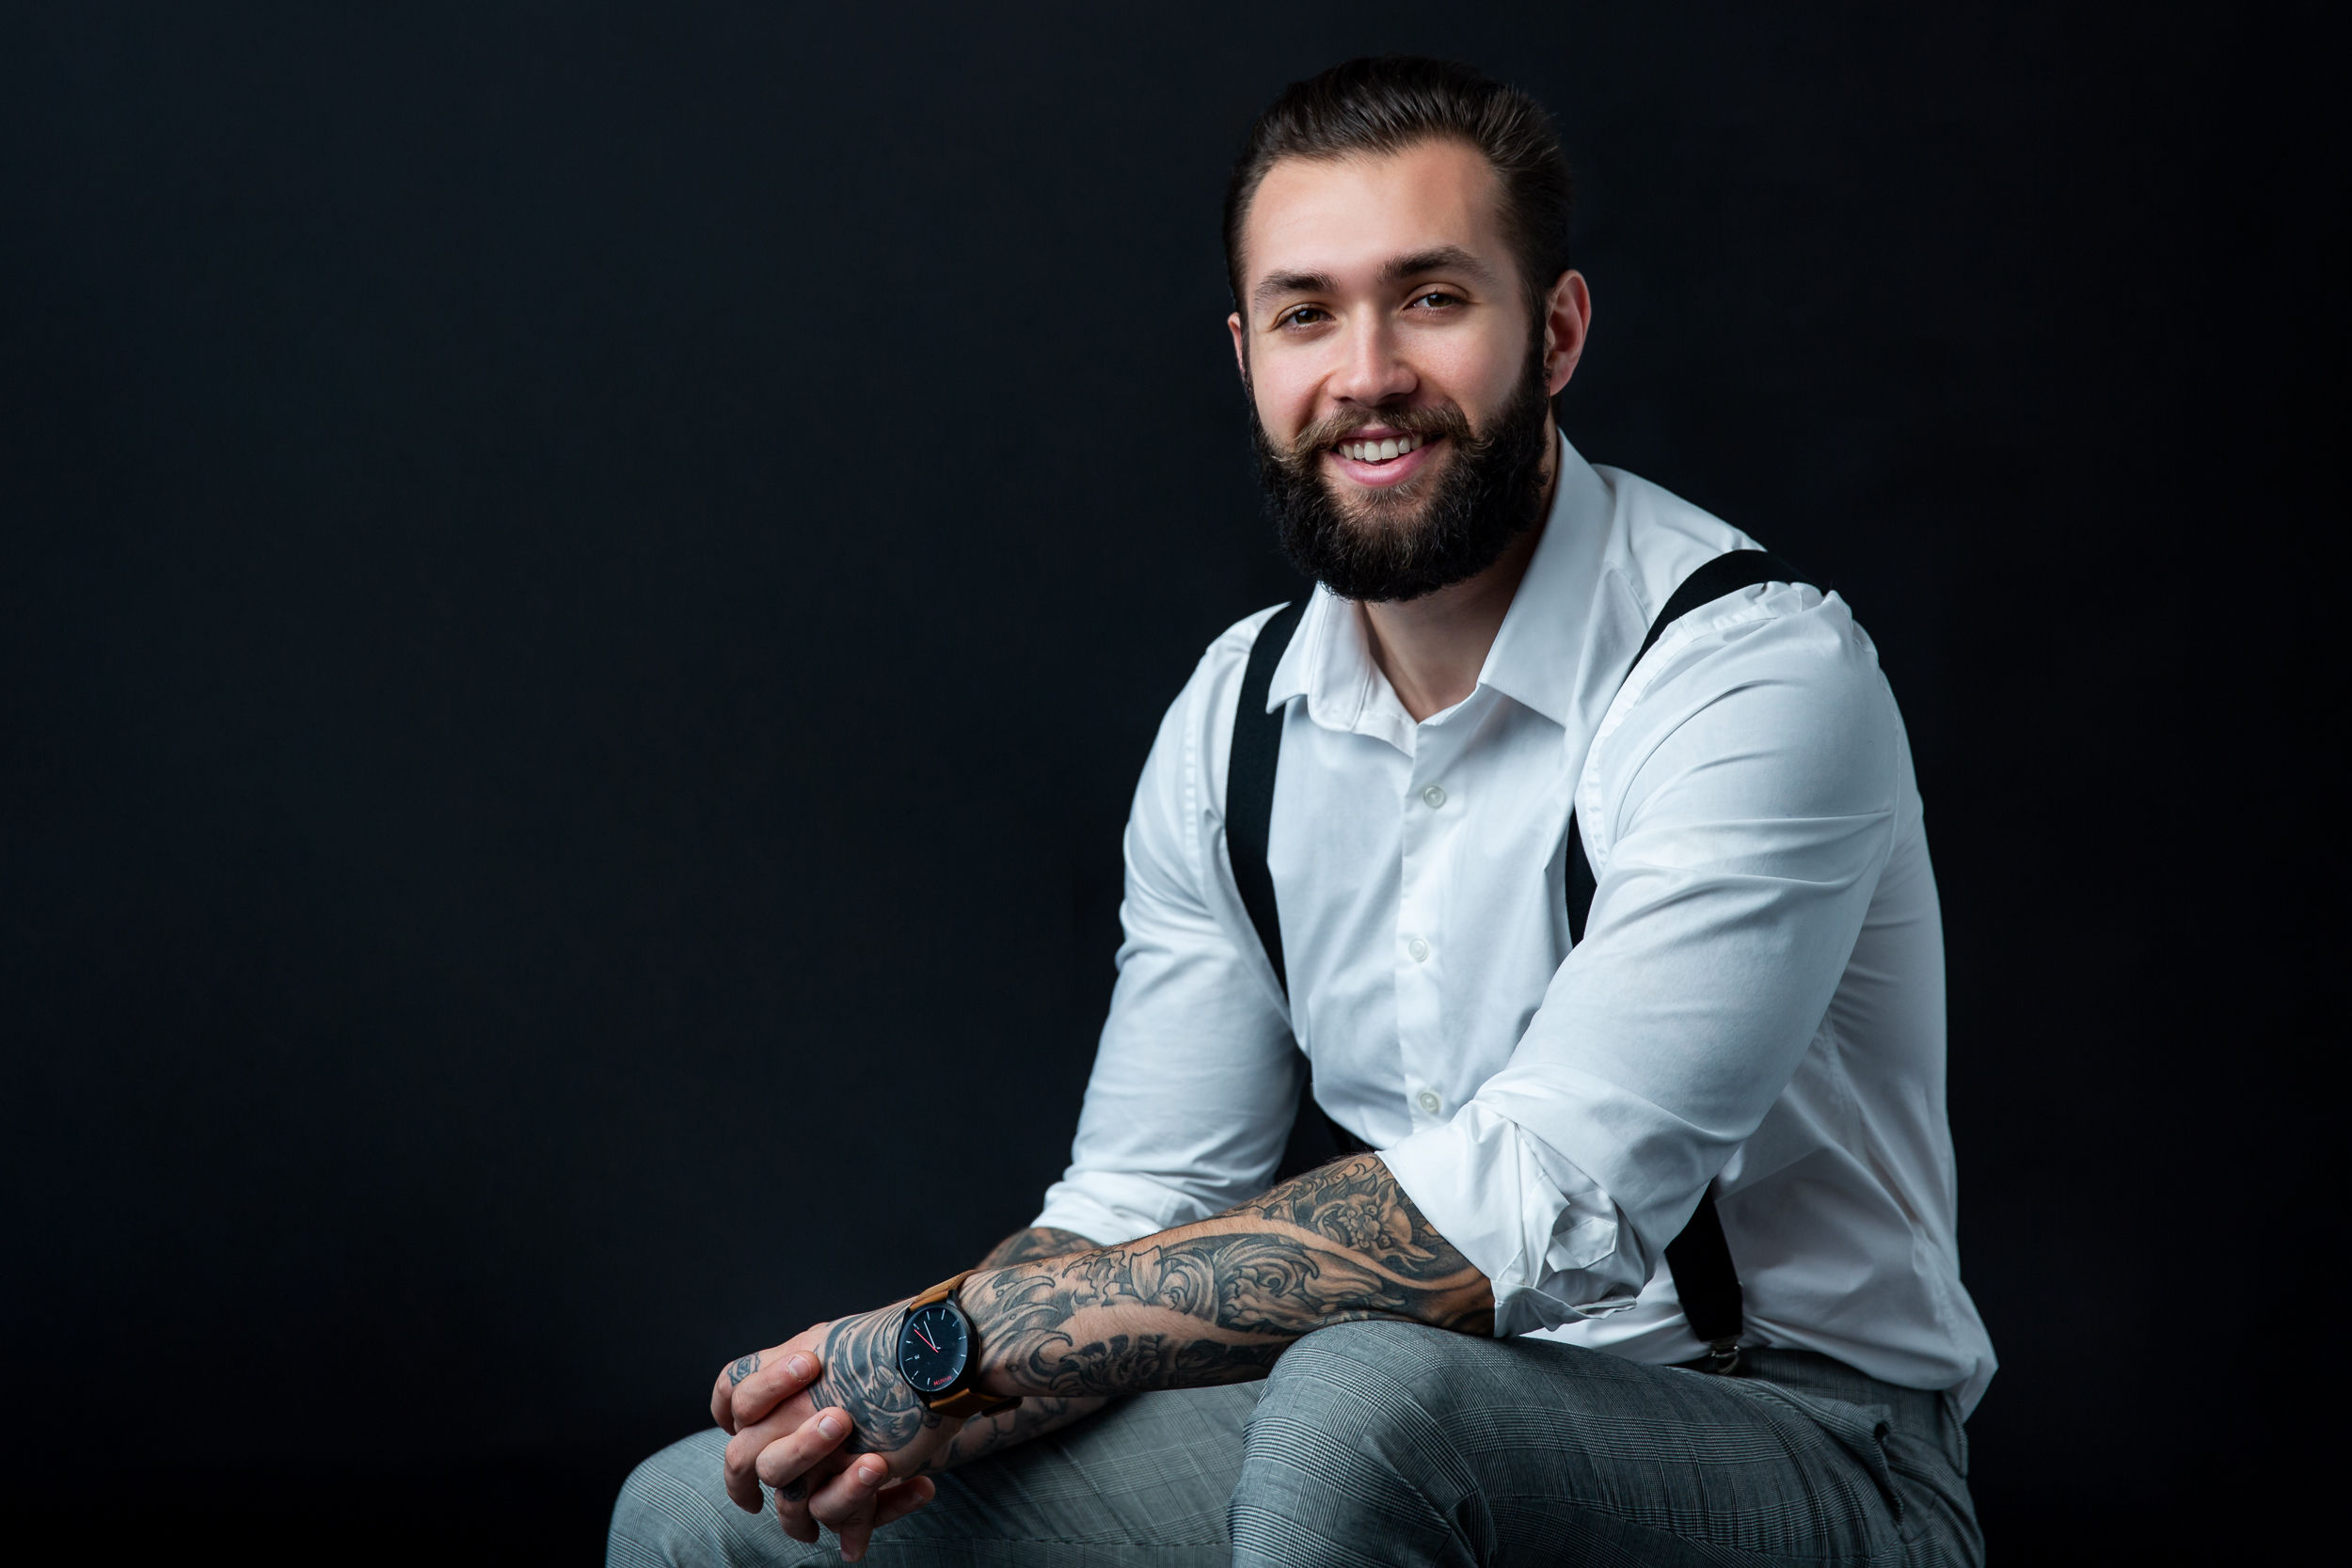
YOUR HEADSHOT IS MORE IMPORTANT THAN YOU THINK IT IS
Just about everyone turns to the Internet when searching for a product or service nowadays, and when they land on your website—your digital storefront—you have milliseconds to make a good impression on a prospective client.
Headshot sessions are 15-30 minutes in length, are done at my studio (either inside or outside), with up to three outfit changes, and various poses to choose from.
Your images are edited to professional standards and are delivered to you in high-resolution jpg files along with a release.
Professional hair and makeup is not required, but are highly recommended, and is available for an additional $200.
investment
Option 1 Session Fee: $197
15-minute session
• Up to two outfit changes
• One High-Resolution Digital Image
Option 2 Session Fee: $347
30-minute session
• Up to three outfit changes
• Three High-Resolution Digital Image
Professional hair makeup is available (and is highly recommended) for an additional $200.
Full payment is required at time of session.
Each headshot session includes the following:
• My time and talent
• Clothing/outfit tips
• In-studio or outside options
• Post-production to ensure professional quality
Group Discounts
10% Discount on groups of two to five
15% Discount on groups of six to ten
20% Discount on groups of eleven or more
CONTACT TINA
Questions or comments? I’m here to help! Your questions and feedback are important to me and I’d love to hear from you.
Click the button below to schedule a free consult and let’s get started!
xo, Tina
how it works
- Book a day and time
- Phone consultation to discuss clothing tips
- Hold headshot session (payment due at this time)
- Photos are uploaded to an online gallery
- Select your favorite(s) & send me the slide numbers
- I edit your selections and email the high-resolution digital image(s) to you along with a release
clothing tips
1. Think about where and how you’re going to use your headshot photos, such as social media, book cover, or website. Then, consider how you want to represent yourself on each of those platforms, which will help guide you in making decisions about what to wear.
2. Business, casual, or both. If you want to showcase yourself as a business professional, a blazer layered over a blouse would be perfect. If you desire to come across as more casual, then jeans and a beautiful top would be suitable. If you’re a personal trainer, workout clothing would be fitting.
If you’re a high-level executive coach who loves luxury, an evening gown to showcase your luxurious lifestyle is a must. If you’re a mystic, goddess, spiritual leader, a flowing BOHO style dress would be fitting. You get the idea. Be who you are. Show the world who you are.
3. Solid colors or simple prints work best for photos. Bold patterns tend to be distracting, and we want to be sure that YOU remain the main subject, not your dress. Select colors that either match or complement your branding colors.
Guys, any color shirt works well when paired with a suit coat: light color shirt with a dark suit coat, dark color shirt with a dark suit coat, or a dark color shirt with light suit coat. You can mix and match coordinating patterns, or wear a solid shirt and a suit coat with a pattern.
If you’re planning on wearing only a button-down shirt (without a suit coat) for a more casual look, a darker color shirt photographs better than a light color shirt.
4. Bring two to three outfits with you to your shoot. These can be casual, business, or as dressy as you like. For example, three outfits that are different yet coordinate with one another: a blazer layered with a cami and paired with blue jeans or black pants, a simple dress for the second change of clothes, and a blouse paired with white jeans for the third outfit.
5. Dig through your closet, but don’t be afraid to invest in new pieces. Your headshot is more important than you think it is. You have milliseconds to make a good impression on a prospective client when they land on your website—your digital storefront. This is the time to look your best.
I highly recommend investing in updated clothing pieces instead of wearing something that’s ten years old. When you give yourself the gift of showing up as your best self, you’ll feel like a million bucks inside, and your real personality will shine through in the photos. And when you allow yourself to shine, you’ll attract people you love working with, who enjoy working with you.
Rent the Runway is a really great option for outfits for your photo shoot. This company rents designer clothing for low cost. You can order more than one size to be sure the item fits, and you can even sign up for a membership to have several pieces shipped to you each month. Everything is dry-cleaned and shipping is included—they keep it super simple. I’ve used this a couple times for glamour shoots.
6. Accessories. Keep it simple when it comes to accessories. Wear small pieces or even nothing at all.
7. Shoes. For headshots, you don’t have to worry about shoes as we’ll stick to close-up and mid-shots. For personal branding, you’ll have to put some thought into your footwear. Bring what you need for each outfit change.
HAIR & MAKEUP
1. If you can afford to hire a professional makeup artist (I have an amazing woman that I work with!), or go to your salon to have your hair and makeup done for you, please do. A professional makeup artist knows how to apply and layer makeup specifically for photo sessions.
2. If you’re going to do your hair and makeup, make sure to give yourself extra time, then it usually takes you. The last thing you want to do is rush through getting ready and show up to your shoot stressed out.
3.Start with your hair down. It’s up to you whether you want it straight or curled. If you want your hair up in a ponytail for some casual photos, let your photographer know so he or she can plan to do those toward the end of your session.
4. Beauty regimens. Make sure to schedule extreme beauty regimes such as exfoliating or peels, several days before your session, so your skin has time to recover.
5. Eyebrows and facial hair. If you’re going to have your eyebrows waxed, or any facial hair waxed or bleached, make sure to do that at least two days ahead of time. Guys, make sure to shave before your session (the day of your photo shoot).
6. The night before prep. Wash your face and moisturize the night before as well as the morning of your session.
7. Makeup application. When applying makeup, start with adding a light layer of foundation, add concealer under your eyes (if needed), and then a light layer of powder.
8. Make your eyes pop. Add eyeshadow, eyeliner, and mascara each one layer at a time. Keep adding layers so it looks heavier than you’d typically wear on a daily basis to make up for the reduction created through the camera/lens with studio lighting.
9. The extras. Add a little bit of blush if you usually wear it. However, there’s no need to go heavier with it. Add a little highlighter on your cheeks if you have some, and add a little bronzer to your forehead, cheeks, and chin if you have some.
10. Lips. Lastly, apply lipstick, lipgloss, or lip balm.
THINGS TO BRING TO YOUR SESSION
- Clothes. Pressed and ready to go.
- Accessories.
- Shoes.
- Lint roller.
- Makeup and hair products for any touchups.
- Lipstick and lipgloss for touchups.
- Oil blotters.
MY WORKFLOW
- You’ll make the initial contact via phone or email. If you email me, I’ll call you back rather than reply via email to answer any questions for you right then.
- We’ll book a day and time that works best for you.
- During our call, I’ll ask you a series of questions, so I have a good understanding of where and how you’re going to use your photos.
- This gives me a good idea of the types of photos you’ll need so I can start thinking of posing and props, and it helps you narrow down what to wear.
- We’ll talk about all of the tips I’ve included here so you have everything you’ll need to prep for your session. The more prepared you are, the more at ease you’ll feel the day of.
- You are free to reach out to me via email, text, or phone call with any questions leading up to your shoot date.
- We’ll meet on the scheduled day and time at my studio. I’ll meet you at the door and help you carry all of your things.
- You’ll have some time to get dressed in your first outfit and touch up your hair and makeup.
- I’ll take a series of photos using different color backgrounds, with each of your outfits, in various poses so you’ll have a nice collection.
- After your session, I take some time to cull your images by selecting the best ones, and will then upload the unedited images to a password-protected online gallery. I email a link to the gallery along with a password within 24 hours of your session (usually the same day).
- This gives you the opportunity to look through your images at your leisure. Once you have your favorites selected, you’ll send me the slide numbers; I’ll edit those selections to a professional standard, and will then send you the high-resolution digital images in several different crops along with a print release within 24 hours.
- For editing, I remove blemishes, and lint from clothing, and clean up the backdrop (the paper backdrop gets bubbly from the humidity). I also soften your skin a bit, brighten your eyes, and remove any wild wispy hair. My goal is to make you look your best without overdoing anything.
